Showing posts with label bokeh. Show all posts

Thursday, January 28, 2016

D+B Maternity Shoot

Hello everyone!
How have you all been?
It has been almost an year since I blogged. Was pretty caught up and could never spend much time blogging. 
I was constantly updating my fb page and ventured into Instagram.
I Hope to revive my blog this year, it is one of my new year resolutions. Wish me luck dear people.
I have done many shoots in the past year and I will be blogging my experiences as the time permits.
But now I will blog about my first shoot of this year.
I started this year with a maternity shoot.
One of my clients whom I worked with in the month of December referred me to this charming couple and they got in touch with me. 
After a 45 min drive a beautiful evening was awaiting us, and I met these very wonderful people, They were very shy initially. So, I asked them to keep conversing through out the shoot, and also assured them that I don't understand a bit of their language so that they could speak any thing and everything, and boy! that was the best decision ever cause I got some very candid pictures and I couldn't be more happy.

Their smiles were so contagious and I was smiling through out the shoot. 


Wednesday, October 23, 2013

Macro Photography tips for Point and Shoot cameras IV

Hi! 
Hope you are all good today, and did you enjoy my yesterdays post?

Let us continue the tutorial in macro photography, we have discussed 3 points so far, now the next point of importance is STURDINESS OF HANDS OR TRIPODS.

Using tripod is a very important step to achieve those wonderful macros, tripods allow us to achieve the details of the subject very well because the lens is stable and the chance of moving is eliminated, which results in blur free images. The usage of tripod becomes inevitable especially while shooting insects outdoors. The insects are either very fast moving like dragon flies, bees etc or the branch or flower on which the insect is sitting or feeding might be swaying in the breeze, remember not only high velocity wind effects the picture quality but even a little breeze can do much harm, and the lens when set in macro mode is vulnerable to even these slightest changes in the air, so If you want a better macro photograph, consider getting a tripod very soon just like me or you will end up getting such blurry images .


I will very soon get a tripod and will post it's details very soon.Very good tripods are available even for a lesser price. Check out this link from Flipkart for a variety of tripods in an affordable range. 
Word of caution: Please read the customer reviews and various video links attached on the site before purchase.

Okay, people don't be disheartened if you cannot think of getting a tripod now, I will post a few pictures which I took without tripod and will surely hope that even hand held shots can be wonderful. The trick is to have very sturdy hands.
The following two picture were hand held


Or another cheap idea is to rest our camera on something solid if available. 
Eg. I would like to display two images here which have been shot in an interval of a minute, the Exif,is the same but a slight variation in the angle which they were shot.


You can click on the images for a closer view.

The two images displayed here are of Euphorbia milli flowers from my home garden(not much of a garden though) both of them look equally good, they were clicked using all the earlier mentioned points in the previous posts like a shallow-depth-of- field, an appropriate angle to showcase the pollen inside the flowers, and the white balance is set properly as to not burn the colors of the image.

But the only difference is that the first image was shot by resting the camera on the window grill while the second shot was hand held.

Now when they were zoomed to 100% and cropped appropriately it resulted in the following images, 


Now do you see the difference in the clarity of the pollen?
The first image has a relatively clearer pollen than the second image.

That is the reason the camera has to rest on some support, but that is not possible every time, is it? Hence the importance of tripod cannot be ruled out in Macro photography.

Hope my article helps, do write in if you have any doubts and I would be honored to reply. And keep checking for my further tutorials.

PS: Please click on the images for a bigger view.

Have a great day people, keep smiling and Keep clicking.

Cheers, Deepthi Nannam

Tuesday, October 22, 2013

Macro Photography tips for Point and Shoot cameras III

Hello everyone!
How are you all doing?

Hope you have enjoyed my last post on Lighting tips in macro photography for Point and shoot cameras, If you haven't read it yet then please do visit  because the present post is a continuation of the last post.

Don't you ever look at the wonderful macro pictures on the internet and wonder if you could also click something like those. But very often we get discouraged because we do not have the right gear for that, and admit it that we do envy the fact that those people have those hi-fi cameras and fancy lenses. But do not be dis heartened dear friends because I'm a person just like you, having only a "POINT AND SHOOT" camera. But that doesn't stop me from experimenting time and time again until I get the desired results. 

The macro mode built in the point and shoot cameras also give some amazing photos provided you are ready to keep trying no matter what and God willing some day you might own a brand new DSLR and those fancy lenses like others, but till then keep pushing your Point and shoot to its limits like I do and trust me, your camera will become your best friend and your pictures will start speaking your thoughts.

For the picture to convey your words an important thing to remember is THE ANGLE OF PHOTOGRAPHY.

Trying to capture a something in almost the same way becomes monotonous after some day and people loose interest in your pictures, so this article will emphasize on the Angle involved in photographing using Macro mode.

Let me explain my point to you through an example


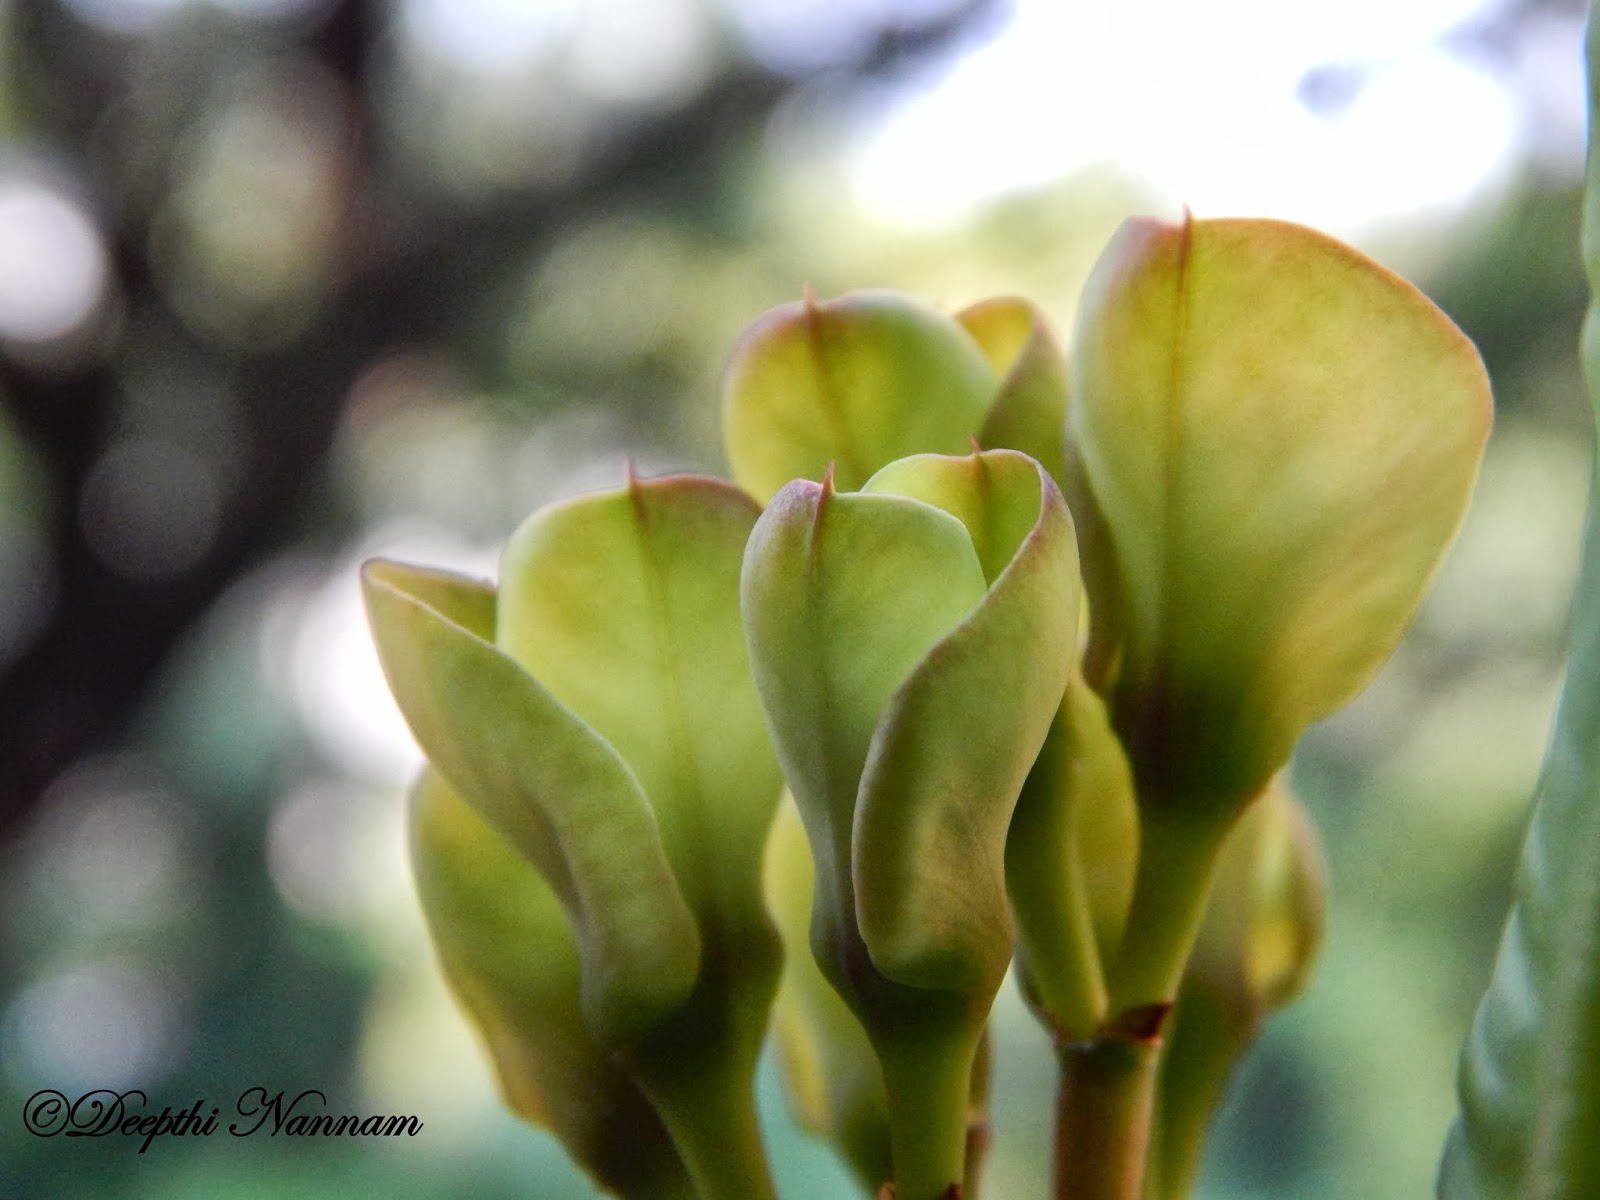
Above are the three shots of the same flower(These are the tender buds of the Euphorbia milli).

1.
In the first picture we observe that the angle is very common this is the common mistake people do while clicking the macros of a flower, they go quite close and they try to focus from an angle above the flower. 
The cons of doing so are that the image is out of focus because the subject is too close to the lens and the details are lost making it a bad picture.

2. 
The second picture is taken by tilting the camera at an angle which is slightly away from the perpendicular shot above. 
Pros: The details of the flower are retained
Cons: The composition is not very interesting
Nevertheless some people might like the picture, depending upon their personal taste.

3.
The final picture shows the buds in a bokeh backdrop, +which has been achieved using a shallow depth of field and the rule of thirds (This will be explained in the coming posts, so stay tuned )have been used to compost the third picture which makes it an interesting composition. 
Pros: The availability of a far away background with trees have been used here to make the subject stand out, and it gives a professional touch.

Stay tuned for the next posts on tips for macro photography.

BOKEH, RULE-OF-THIRDS, DEPTH-OF-FIELD etc will be explained in my coming posts.

PS: Please click on the images for a larger view.

Till then have fun, keep smiling and Happy clicking people.

Cheers,
Deepthi Nannam

Thursday, October 17, 2013

Greater Flameback (Chrysocolaptes guttacristatus )

Hello!
These days I'm so engrossed in Bird photography, that when ever I get some free time i.e. when my 6 month old son sleeps or when my husband has a holiday or during weekends I go out hunting to shoot new birds and to keep them caged in my computer :)

I now present to you all a new debutante in my collection of bird photographs. THE GREATER FLAME BACKED WOODPECKER( Chrysocolaptes guttacristatus)

I saw this bird perched high on a rain tree outside my window a very long time ago and tried capturing it but couldnt capture it clearly due to the thick foilage of the rain tree and very recently the neighboring apartment people had half of the tree overlooking my window chopped down which brought tears in my eyes and the thought of not having any more birds come made me very sad, but neverthless I never lost heart as that is a way in which I tend to spend my little free time, and have been eagerly waiting for it to show up again and I'm pleased to tell you all that it was back and though it was very high like the last time the lack of obstructing branches made my job easy. Though the bird seemed to be in a hurry, I managed to grab some beautiful shots of the magnificent creature.
Hope you like them.

TIPS FOR IDENTIFICATION:
1. Un marked golden yellow to dark brown back and wings
2. The red hood is characteristic of males

Adult male greater flame backed woodpecker

characteristic red crown of an adult male

Saturday, October 12, 2013

White spotted Fantail (Rhipidura albogularis)

This is also called Spot-breasted-Fantail, this is the only fantail found in Goa out of the 4 fantails found in India.

Captured this at Vasco-Da-Gama municipal park. This bird is always there and as soon as we enter the park it kind of welcomes you with a tail display. 

Captured this with my Nikon L820 as well.


look at the tail..hence the name

Wednesday, October 9, 2013

Macro Photography tips for Point and Shoot Cameras

MACROS....oooh!
I kind of like the term and also love clicking in that mode...who doesn't?
I'm neither a professional photographer nor do I own a professional DSLR camera with a fancy Macro lens. (No offense to people with those wonderful Cameras).
Rather I'm an amateur with a great enthusiasm and passion for photography and I own a Bridge camera. But that doesn't stop me from getting some wonderfully clean and crisp macro photos, it shouldn't stop you either.

Today I'm going to illustrate neatly about the steps involved in macro photography with relevant examples.(All the photos in this post are clicked only by a point and shoot camera  by me unless and otherwise mentioned).

First of all...check out for the following flower like symbol on the camera to go to macro mode.

Click on this button, and start clicking, but some cameras like Sony cybershot, etc do not have a special button for macros but rather you have to set your camera in auto mode and get the camera closer to your subject and your camera automatically displays the symbol and you can start clicking.

And before you get close to your subject please press the shutter button slightly which allows you to focus on the subject properly and then in the next click you can start clicking, perfectly focused pictures. And when you slightly press the shutter button then you can know which part to highlight in your picture and the you can blur the other parts.

Important points to remember in Macro photography:

1. Subject
2. Lighting
3. Angle of Photography
4. Steadiness of hands or Tripod
5. Post-processing
And most importantly PATIENCE

All there are interrelated and cannot work without each other.

We come across many interesting things and little creatures in our daily lives which may seem mundane but after careful observation would make for some wonderful SUBJECT..

There is no hard rule, just let your imagination run wild and in no time you will have great pictures. The subjects may be flowers, insects, still life or any thing.

Today I'd like to discuss in detail how ordinary things seem extraordinary in Macro photography. The main focus of the article is upon the FLORA. Check out my Facebook link for other  macro flora subjects

Droplets of rain on a Euphorbia milli leaf with the refraction of the building in the back ground.

These are the flowers of a variety of wild grass which were swaying in the wind, their rich color against the blurry background makes it a good picture.

This is a wild Fabaceae flower(Need help with the ID), The monotonous green of the leaves makes the bright orange stand out

These are the sexual stage of a moss called Funaria, these are very small in size almost a cm or so and go  UN-noticed by everyone

Here the concentration  is on the pollen which being in the same color as the flower stands out cause it has been focused upon.

These are very few examples of what the subjects can be and will discuss the rest in the coming posts. Till then Keep smiling and keep Clicking.

PS: Please click on the images for a larger view.

Cheers,
Deepthi Nannam

Tuesday, October 8, 2013

White throated kingfisher (Halcyon smyrnensis)

I'm on a look out for birds these days and one day in the evening I went into my balcony to close the windows, just then I saw a brilliant display of blue fly across me and I ran to capture the beauty.


White throated kingfisher on a rain tree branch

White throated kingfisher
Please click on the images for a larger view.

An important point to remember in bird photography is to use shallow depth-of-field well so as to create an un- cluttered background which makes the subject stand out.